Photo Gallery Website Layout using Photoshop
 |
| Photoshop Template |
Final Result
 | ||||
| Photoshop Template 2011 |
Lets get started
1. First thing we want to do is create a new document with the dimensions of 1020×12002. Next we want to use our Paint Bucket Tool to fill our background layer with #1F2329.
3. Using your Rectangle Marquee Tool, make a selection equal to the following and fill it with any solid color.
4. Created a new layer & Insert the following blending options onto your layer, and choosing blending options from the drop down menu.

5. For our logo we want to add some simple text on the left side of our header. I used Myriad Pro with my foreground set to #FFFFFF. After you place your text, add the following blending options onto your text layer
6. Your text will look something like this
7. I wanted to add a little “icon” in our header. So, Find an icon you would like to use, an then add it in your header in a similar fashion below. I used the same drop shadow that we used on the text in the previous layer..
 |
| PhotoGallery |
8. Next we want to add some links into our header. Using your text tool set to “Georgia”, add some links in a similar way to the following
9. The RSS Icon used any one.
10. Now what we need to create is some dividers between our links. To do so create a new layer and with your Rectangle Marquee Tool make a 1px wide selection similar to the following and fill it with #FFFFFF
11. Now insert the following blending options onto its layer
12. Go ahead and duplicate the layer you just created and place it in between all your links. When your finished you’ll have something that looks like this:
13. Using your Text Tool, go ahead and insert some text in a similar way to the following to represent your categories. I used Georgia for these links.
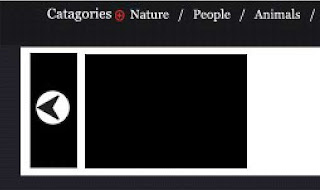
14. The next thing we want to create is our featured area. Using your Rectangle Marquee Tool with a radius of 0px, and a foreground set to #FFFFFF, make a rectangle similar to the following
15. Using your Rectangle Marquee Tool with your radius still set to 0px, make a rectangle similar to the following.
16. Create a new arrow icon I used below. Place it in a similar fashion
17. Go ahead and repeat steps 15-16 for the right side, and you’ll have something that looks similar to the following
18. All that’s left for our featured box is to add our thumbnails. Using your Rectangle Marquee Tool (or Rectangle Tool), make a Rectangle similar to the following and fill it with any color
19. Next, add your thumbnail image. I chose to leave 5px of our Rectangle visible behind our image. We now want to make a spot for the name of our image. Using our Rectangle Marquee Tool again, make a selection similar to the following and fill it with #1F2329.
20. Now lower this layers opacity to about 73%,
21. All that’s left is to add some descriptive text, and repeat this process and your featured area will look like the following
22. The last thing we want to do is layout our content area. Using your Rectangle Marquee Tool with a radius of 0px, we want to make a Rectangle Marquee similar to the following
23. For our thumbnails, we will be using the same options we used in the featured box. The only thing that changes is where the title is placed. and the font color is #0C57C6. For the background of our title, we created a rectangle filled with #1F2329, and lowered the opacity to 9% on that layer. Once you have it all complete, you will have something that looks like this:
24. The last thing we need to add is our pagination and footer. For our pagination, we just used #FFFFFF as our text color. For our active page box (the pink), we used the color #FC4F83. For the text on the right, we used the color #6A7278. After that all we have left is the footer, and you just need to repeat the steps we used for the Categories section back in step 13. When your finished, your template will look similar to the following
 |
| Photogallery Template |


Oh' this photo gallery looks so cool. I like it. I will also try to make something like that this weekend. Thanks for sharing.
ReplyDeleteweb design manila
Very cool site. Def a photo shop fan and a fan of this site. Want to exchange links?
ReplyDeleteভালো পোস্ট
ReplyDelete